
IT administrator instructions for deploying the Propel Outlook add-in to all end users.
- Open the Office admin panel: https://portal.office.com/adminportal/
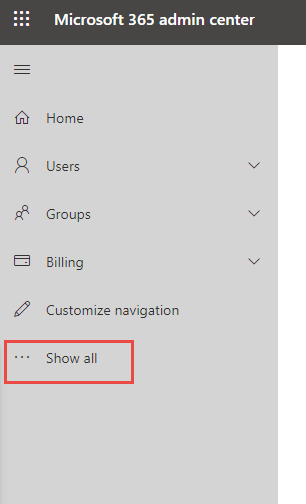
Make sure you are signed in as an administrator. - From the main menu, click Show all.
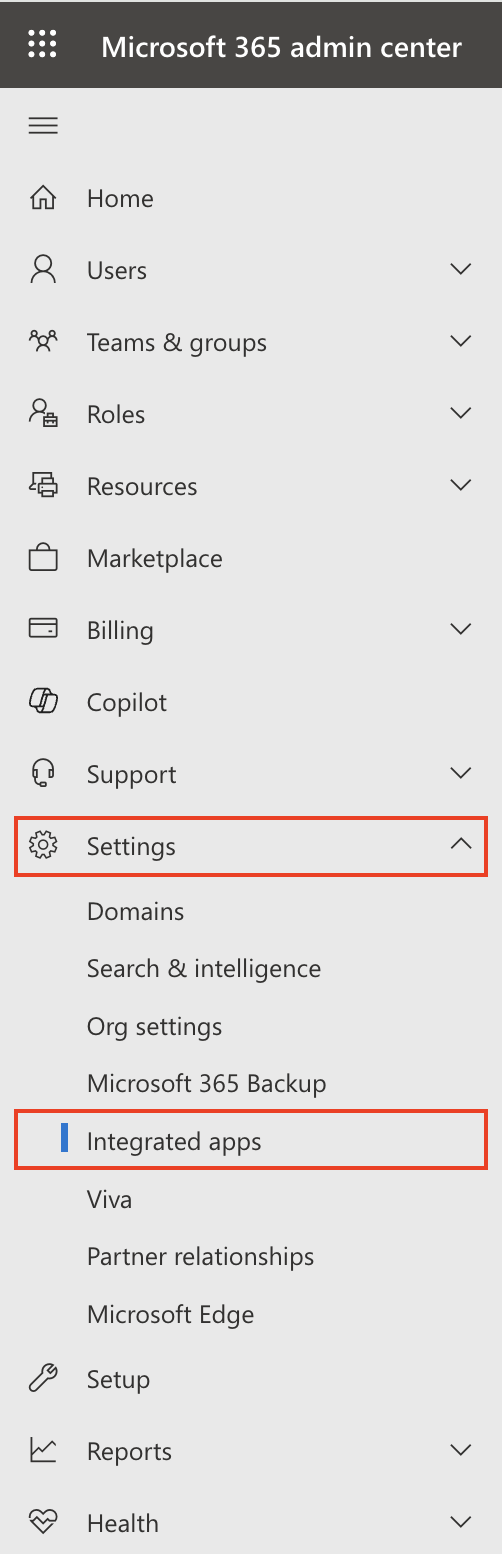
- From the expanded menu, click Settings and then Integrated apps.
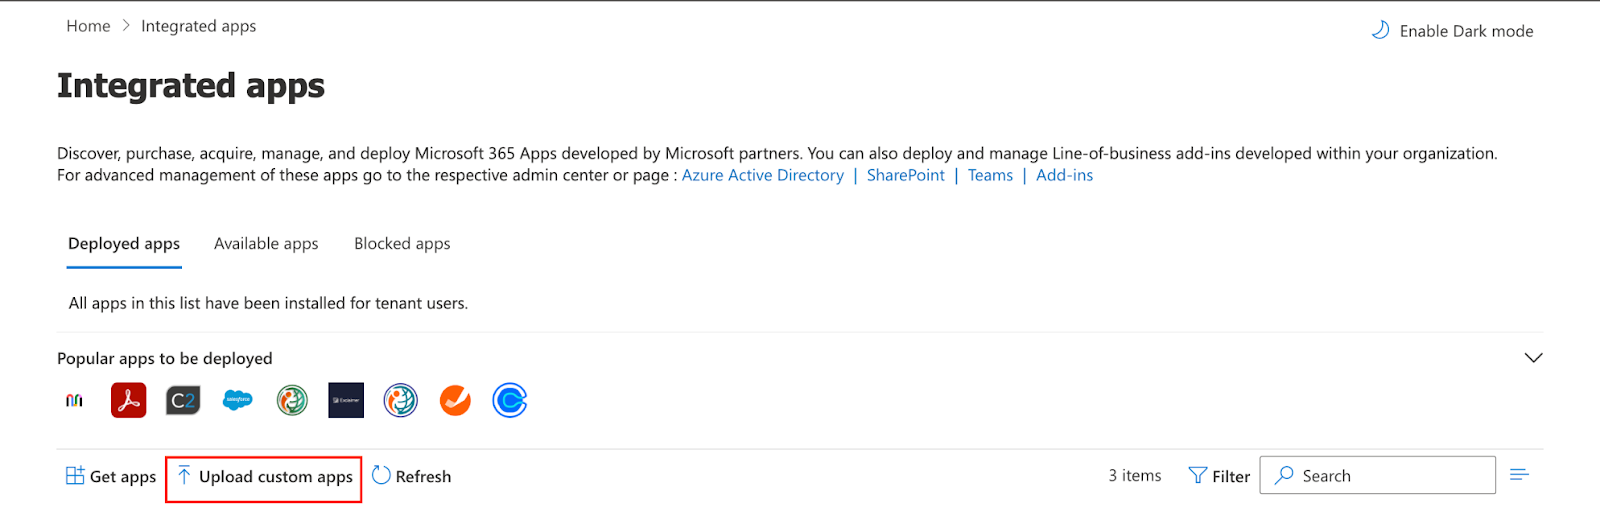
This opens the Integrated Apps screen. - Click on Upload Custom Apps
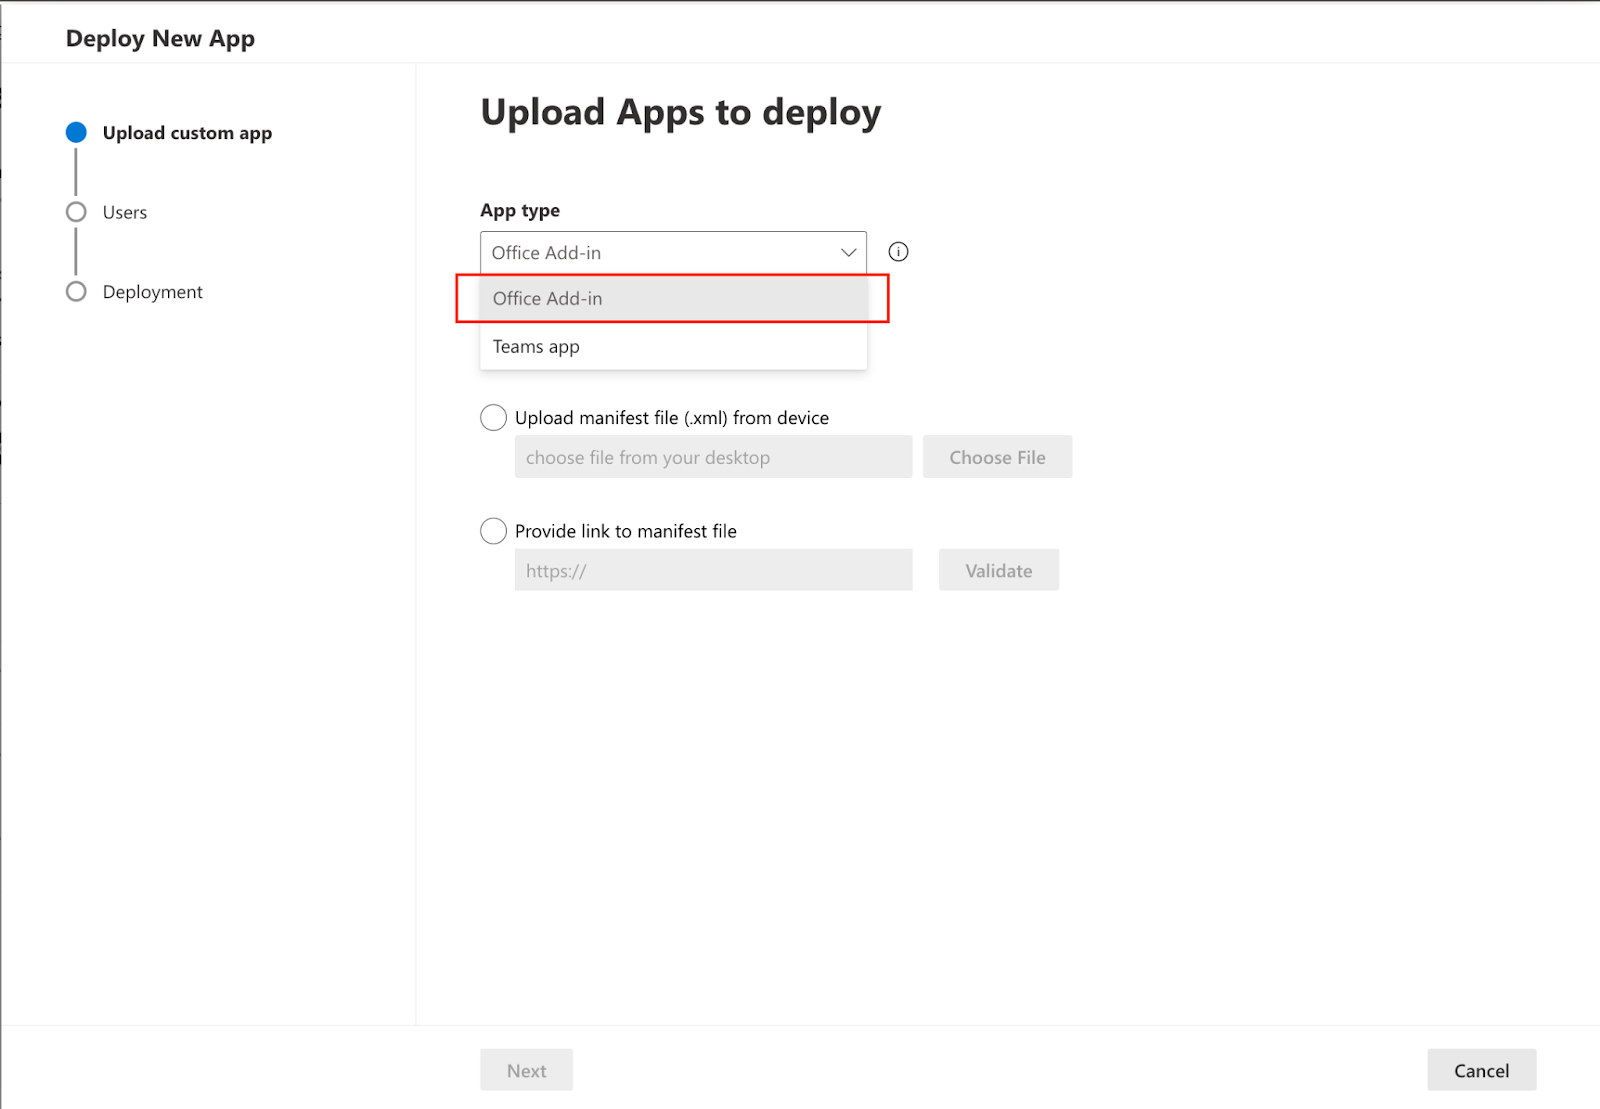
This opens the deploy new app pop-up - Select Office Add-in in App type
- Choose to Provide link to manifest file and enter the following URL exactly: https://outlook-js.propelmypr.com
(Make sure to include https:// even though it already appears in the grey box.) - Click on Validate, and once validated, click on Next.
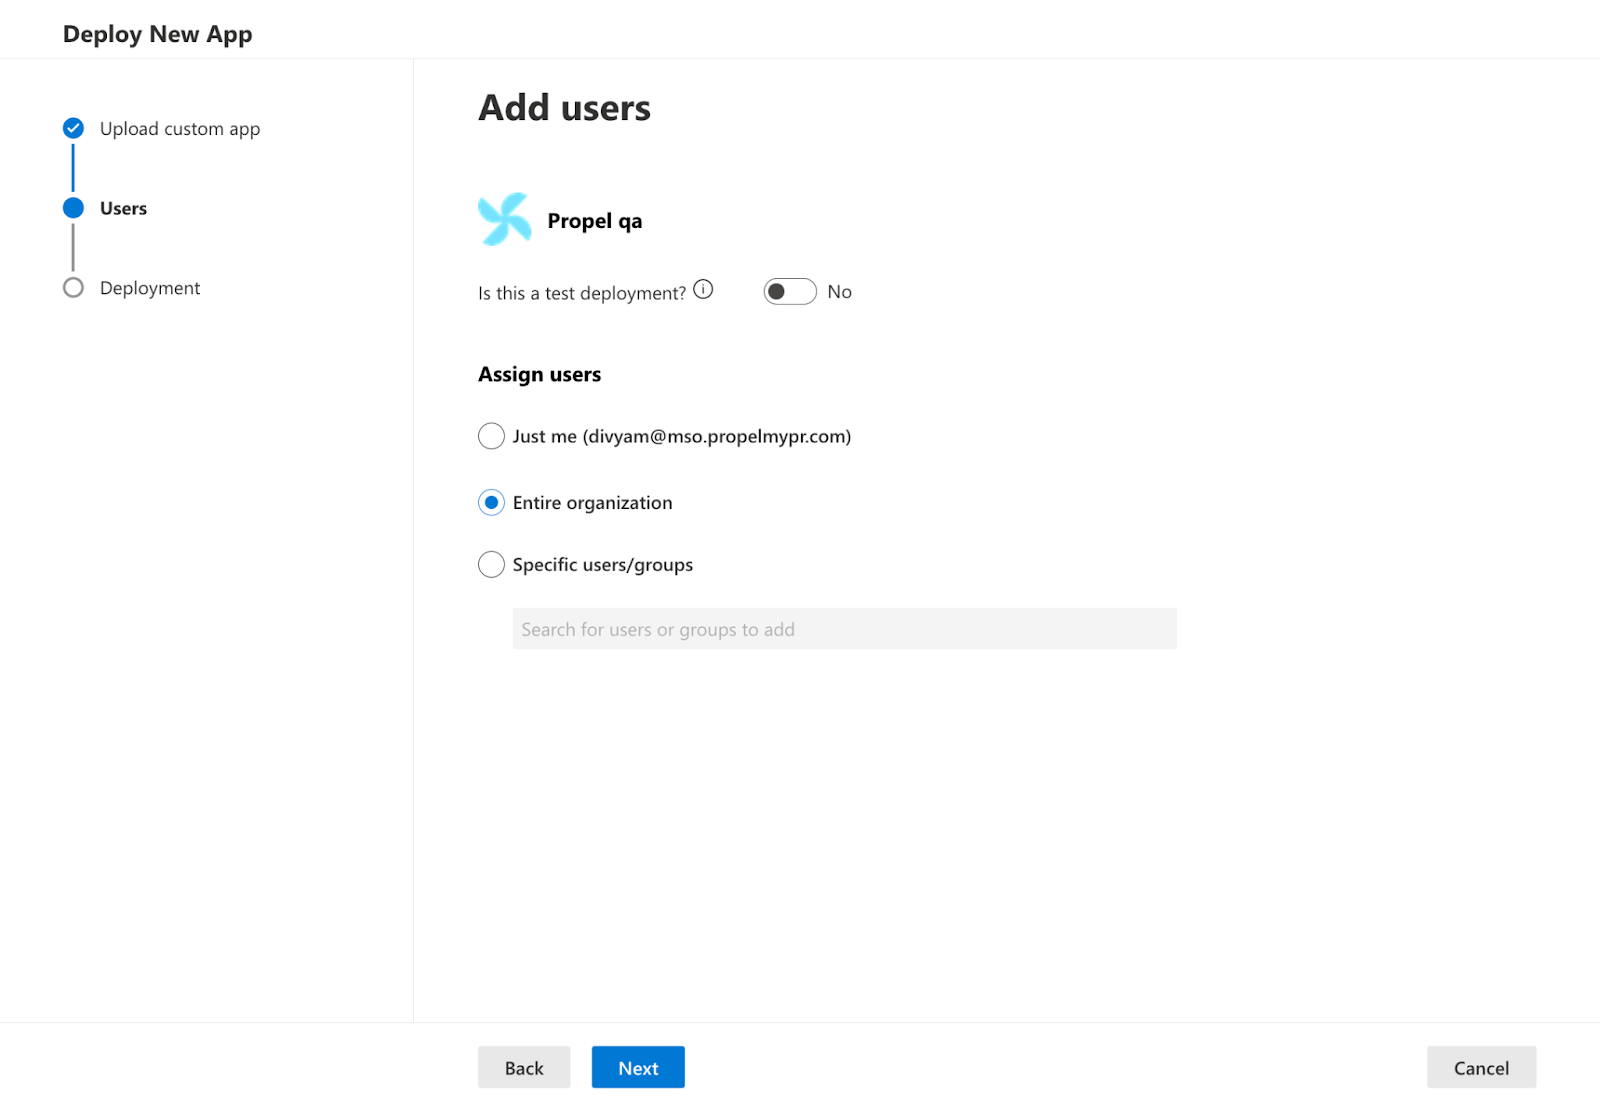
- Choose which users should receive the Propel add-in and click on Next
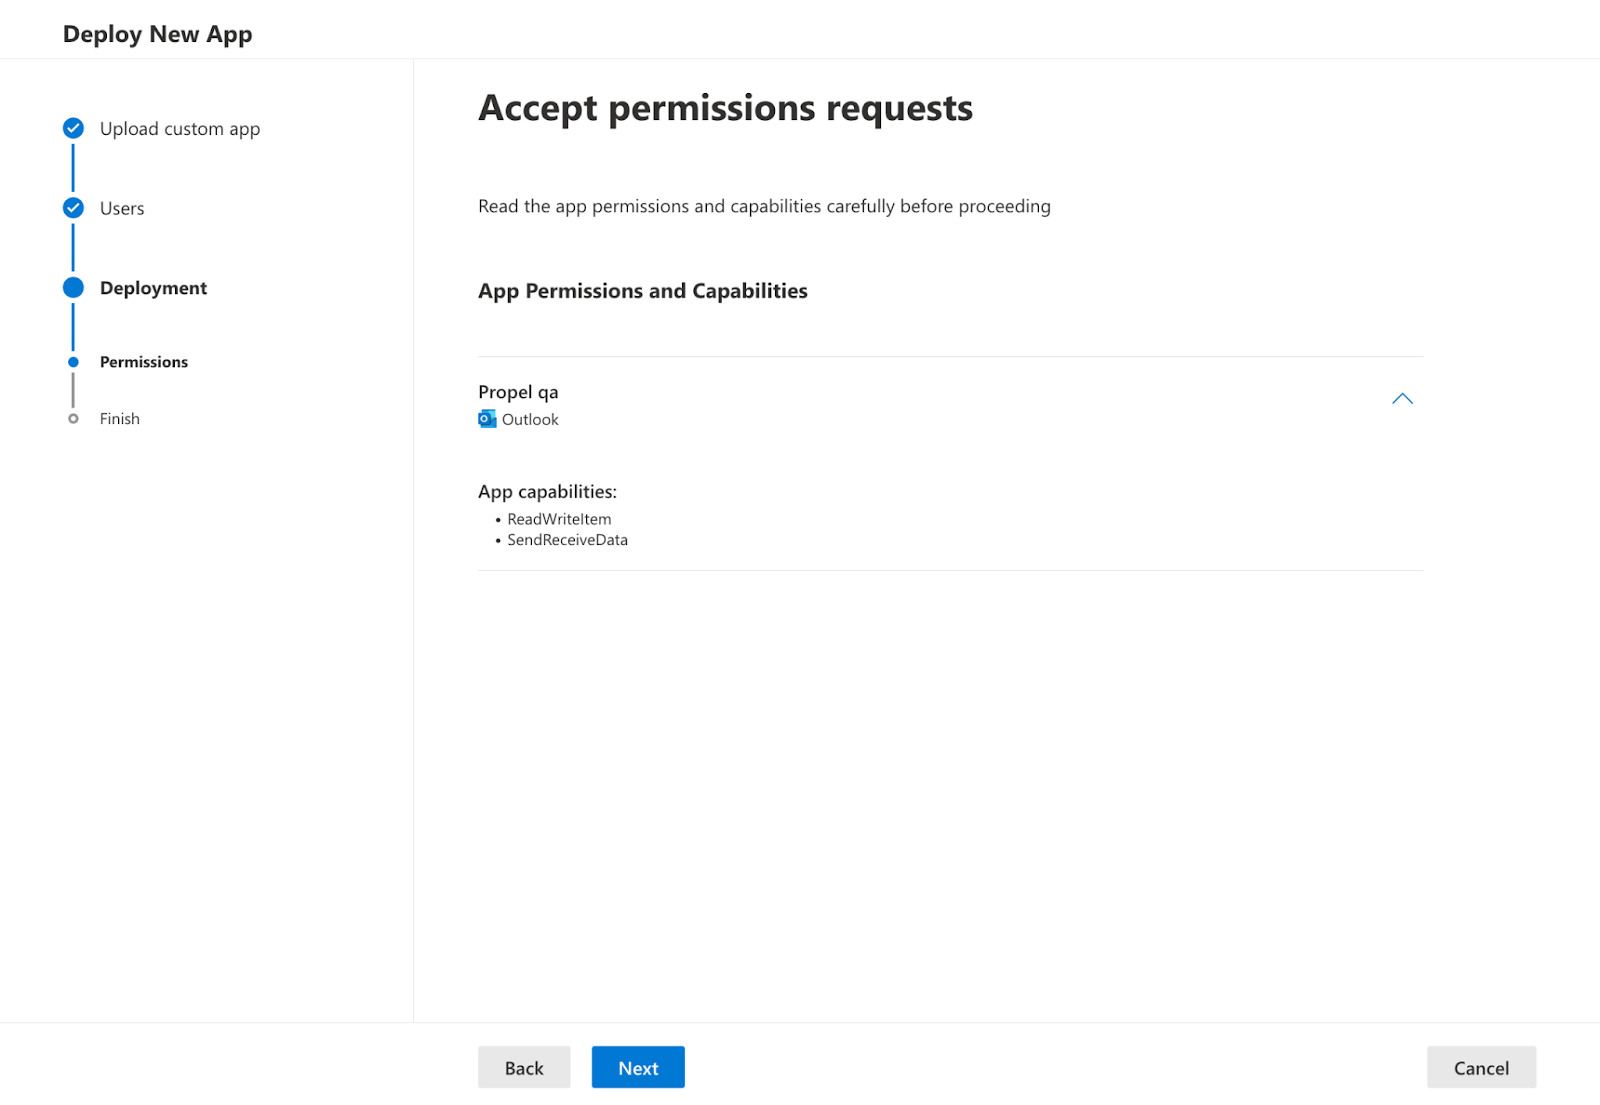
- For users, either select Everyone or specific users/group. Creating a group that includes all users of Propel may be the most convenient option. Consult the Office documentation if you need help creating groups. - Review the permissions and click on Next
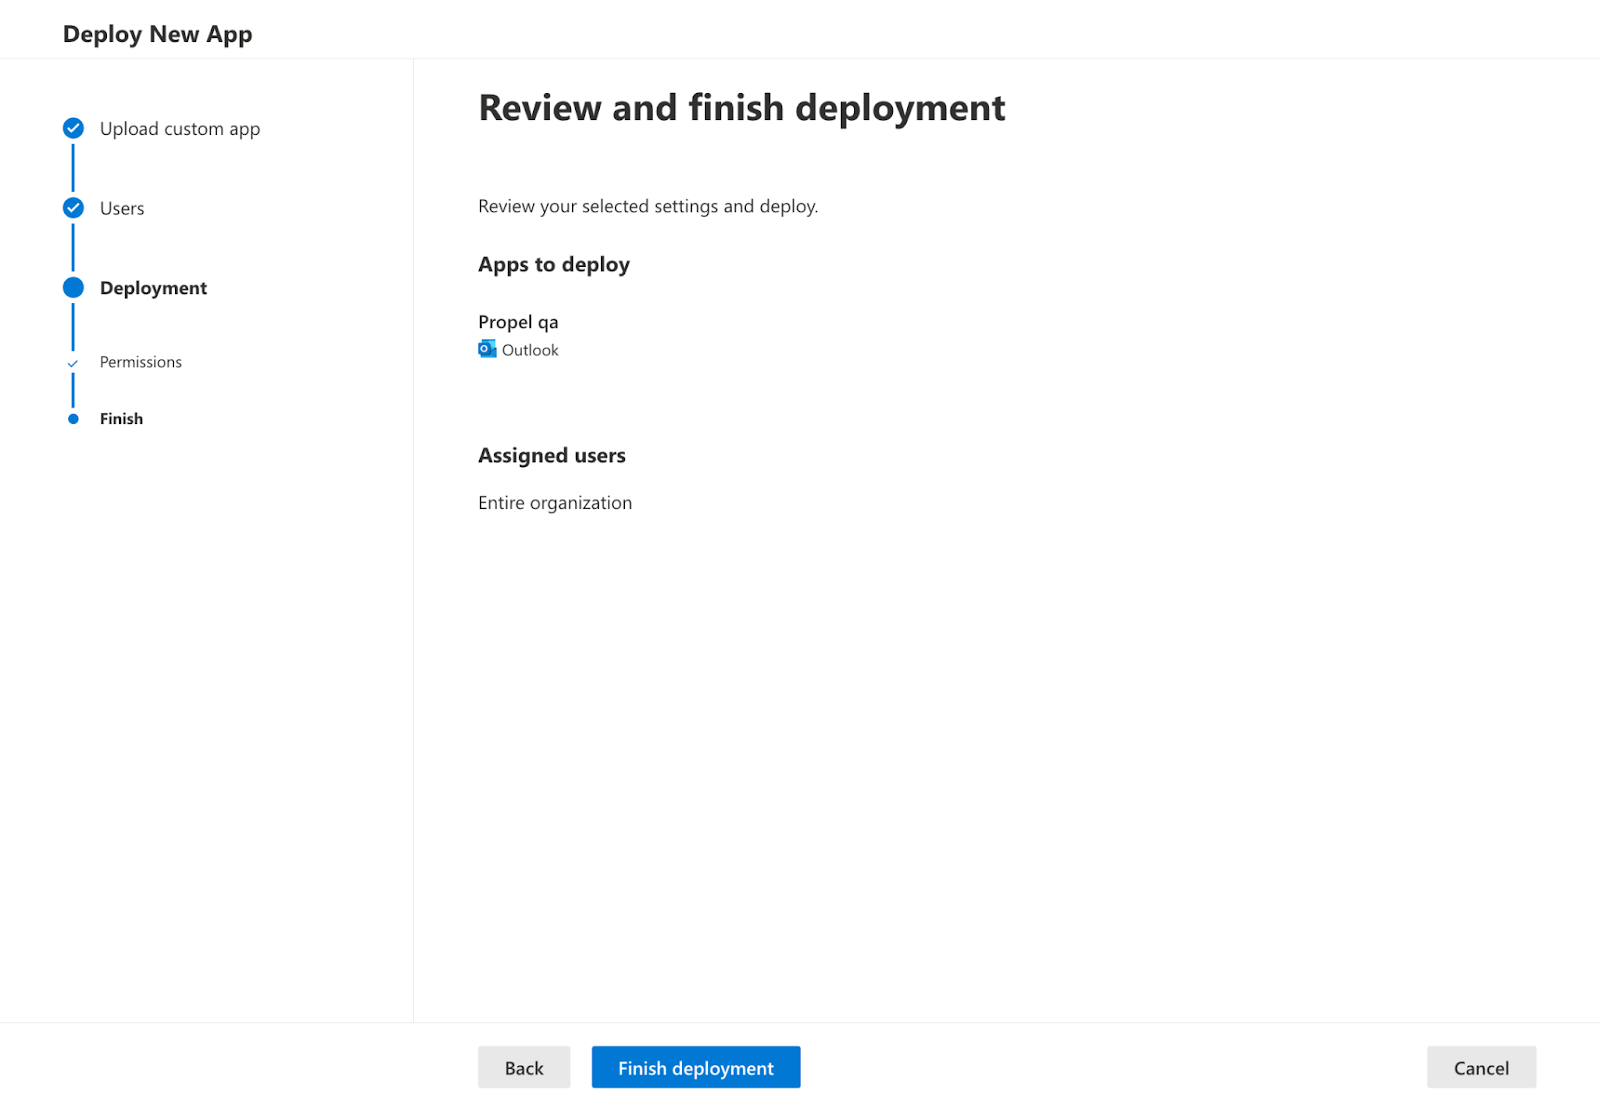
- Click on Finish deployment
- Once deployment is completed, click on Done to complete the process and Propel should appear in your list of Deployed apps.

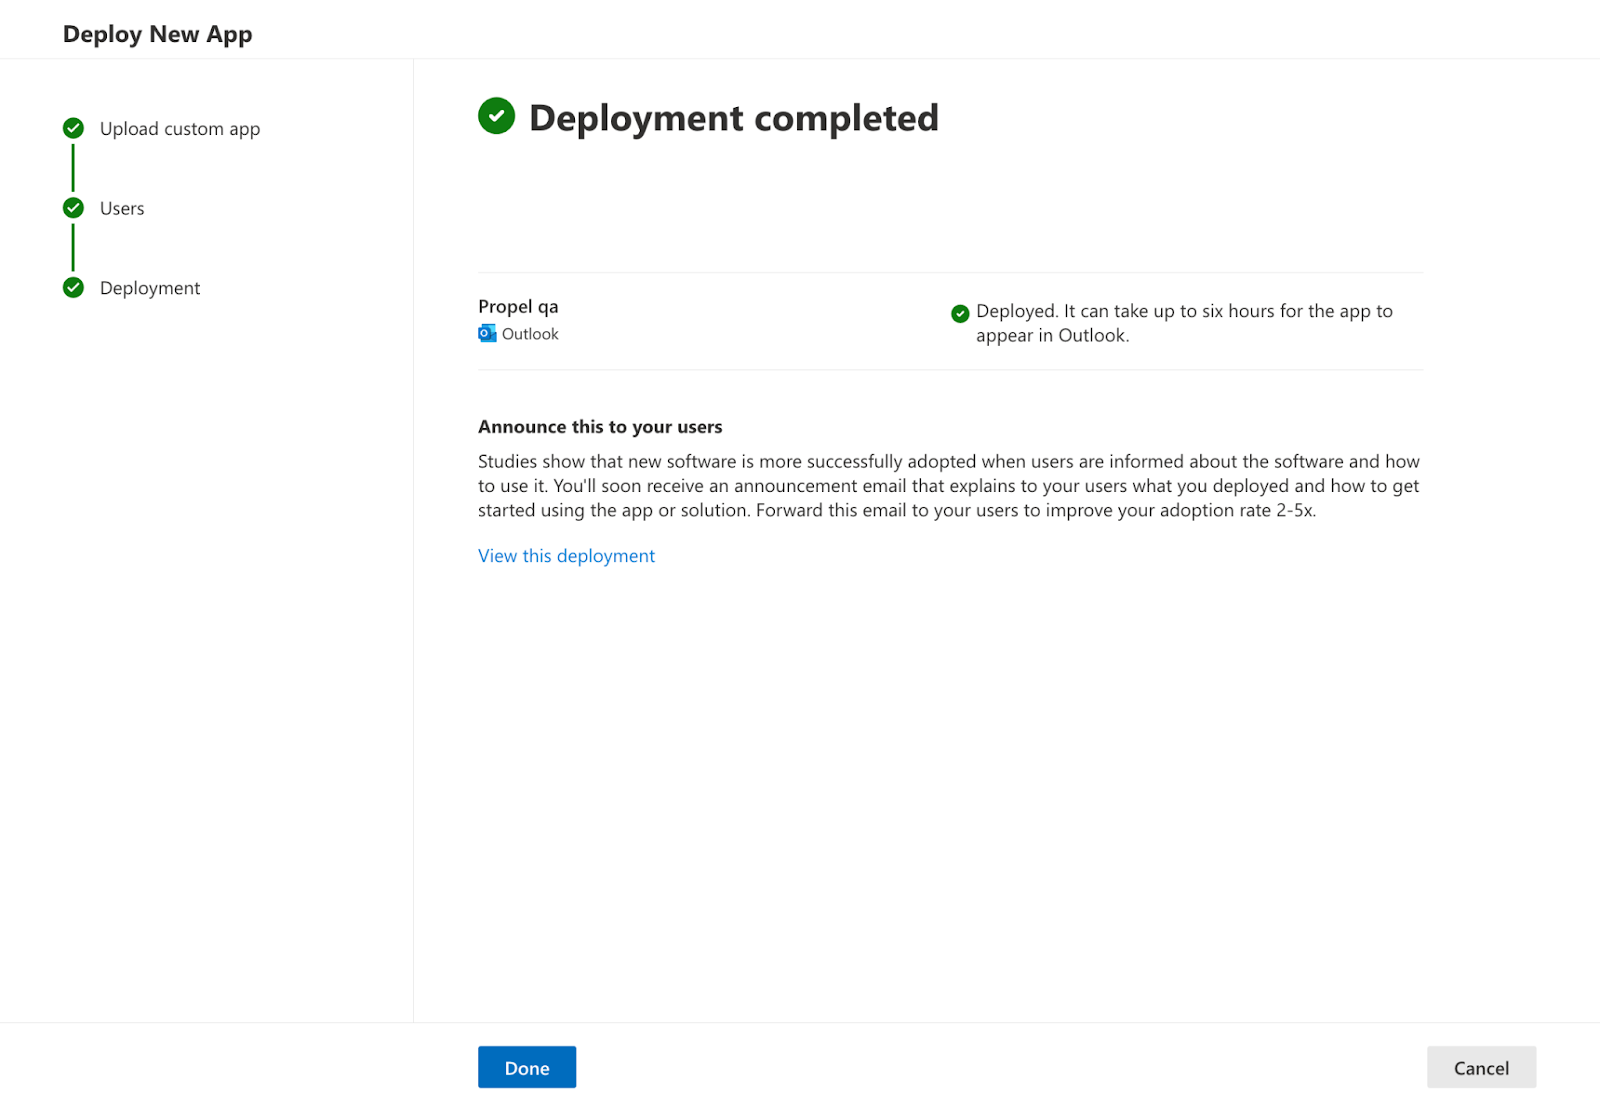
Congratulations! The Propel Outlook add-in is now deployed! It can take up to 12 hours for users to see the Propel add-in in their Outlook ribbon, and this is normal.
You may also need to grant consent to the Outlook add-in. Please click here for further information.
If you have any questions or concerns, or if you need help with installation, please contact Propel support.