
Import your existing contacts to Propel from a CSV file.
One of the most important first steps when you start using Propel is to import all of your existing media lists and contacts. This will allow you to stop using your spreadsheets and get the maximum benefit from Propel's media list and contact management. The easiest way to import your existing lists is from a CSV upload.
When you upload contacts, you have the following choices:
- Upload to a media list – All contacts in the CSV upload will be attached to the media list. They will also appear in My Contacts
- Upload to My Contacts – Contacts will be added to My Contacts but will not be attached to any media list. You can attach them to a media list later
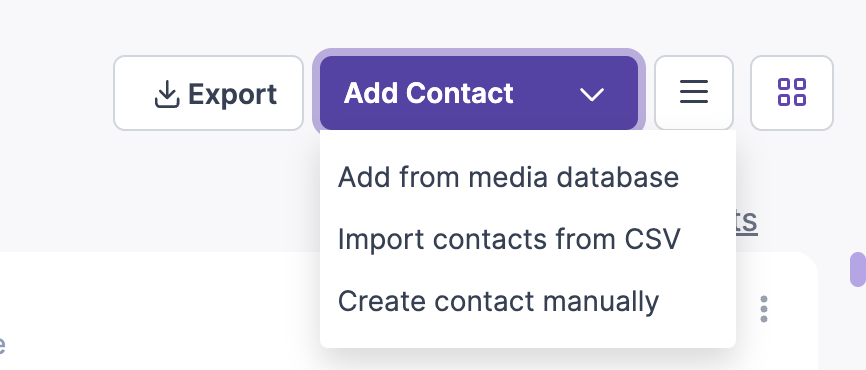
To upload a CSV, open either a specific media list or My Contacts. Then click the Add Contact button in the top right corner and choose Import contacts from CSV from the dropdown.
Saving Your Media List as a CSV
Your current media lists are probably stored in one of the following formats:
- Google Sheets
- Microsoft Excel
- Another CRM
In order to import these media lists to Propel, you must save them as a CSV. Here are some brief instructions for saving your media lists to CSV.
Google Sheets
From the Google Sheets menu, choose File -> Download -> Comma separated-values (.csv, current sheet)
Note: There is a known issue when downloading a Google sheet as a CSV when the sheet has non-English characters in it. If any of these characters appear as gibberish, download your spreadsheet as an Excel file first and then follow the instructions for Microsoft Excel to save your file as a CSV.
Microsoft Excel
From the Excel menu, choose File -> Save As -> This PC, and in the dropdown where it says Excel Workbook (*.xlsx), choose instead CSV UTF-8 (Comma delimited) (*.csv)

Your previous CRM
Check your CRM documentation for export to CSV option or Excel and then convert it into CSV as shown above.
Important!
CSV files do not support spreadsheet tabs. If you are creating your CSV file from a spreadsheet that has multiple tabs, you will need to save a separate CSV file for each tab. You will then import each CSV to Propel individually.
Formatting Your CSV
One of the great things about spreadsheets is that they allow you to format your data in any way you like. However, when you upload a CSV to Propel, your CSV file must follow certain rules.
- Each contact must have a first name and either an email address or a phone number. If the contact is a general news desk, we recommend putting "Newsdesk" as the first name and the media outlet name as the last name
- Each contact should appear in its own row. If you have multiple contacts for a media outlet in the same row, create a new row for each
- If you have multiple email addresses for a contact, each email address should appear in its own column. Propel allows you to import up to three different email addresses for each contact
- Make sure that each column contains only one type of data. If a column is dedicated to email addresses, it should not contain phone numbers. If you have a subheader line halfway down your spreadsheet, the columns above the subheader should contain the same type of data as the columns below the subheader
Tip: Please download sample CSV from Propel to avoid any formatting issues. When you click on Import from CSV, you get an option to download a sample CSV file.
If you would like to see a sample CSV, click the Download sample CSV button.

Mapping CSV Fields
Once you've saved your media list as CSV and finished formatting it, you're ready to upload it. Click the Upload CSV button and choose your CSV. This brings you to the map CSV screen.
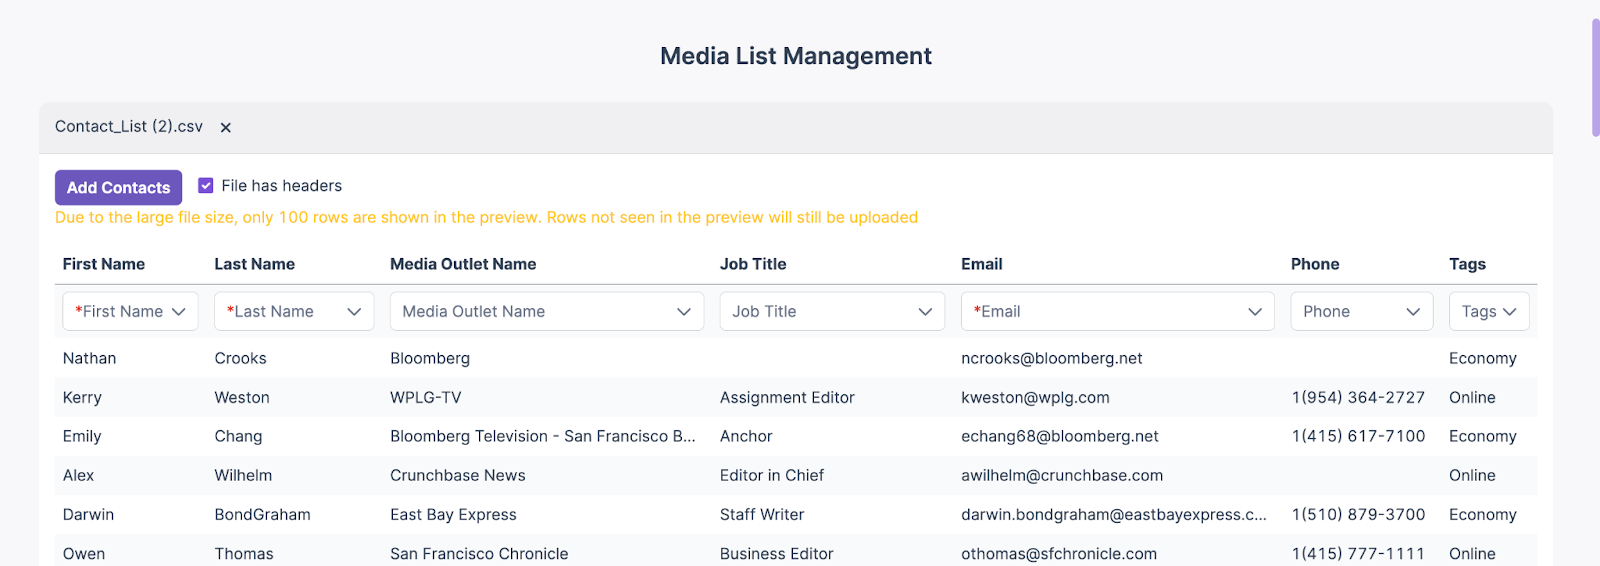
Make sure that each column is correctly mapped to the data it contains. When you've finished, click Add Contacts to Media List. Remember that you don't need to map all columns – if you have any data that doesn't need to go into Propel, just leave the column unmapped.
Adding Tags or Notes
You can easily tag contacts or add notes during a CSV upload. This is very helpful so that information is not lost when importing your contacts into Propel.
To add tags or notes, simply add an additional column to your CSV for each of these two fields. If you have multiple tags to add to a single contact, they should all go into the tags column, use a comma to separate them.
Handling Errors
Once the CSV upload is complete, you will see a message showing you the total number of saved rows and the total number of unsuccessful rows if some eros are present there.

Click Download failed CSV to download only the rows that have failed. Each row has a message describing the problem with that row. You may fix whatever problems were found in these rows and then re-upload.
Need help with your CSV import?
If you require any assistance uploading your media lists as CSV, please let us know, and we'll be happy to help.